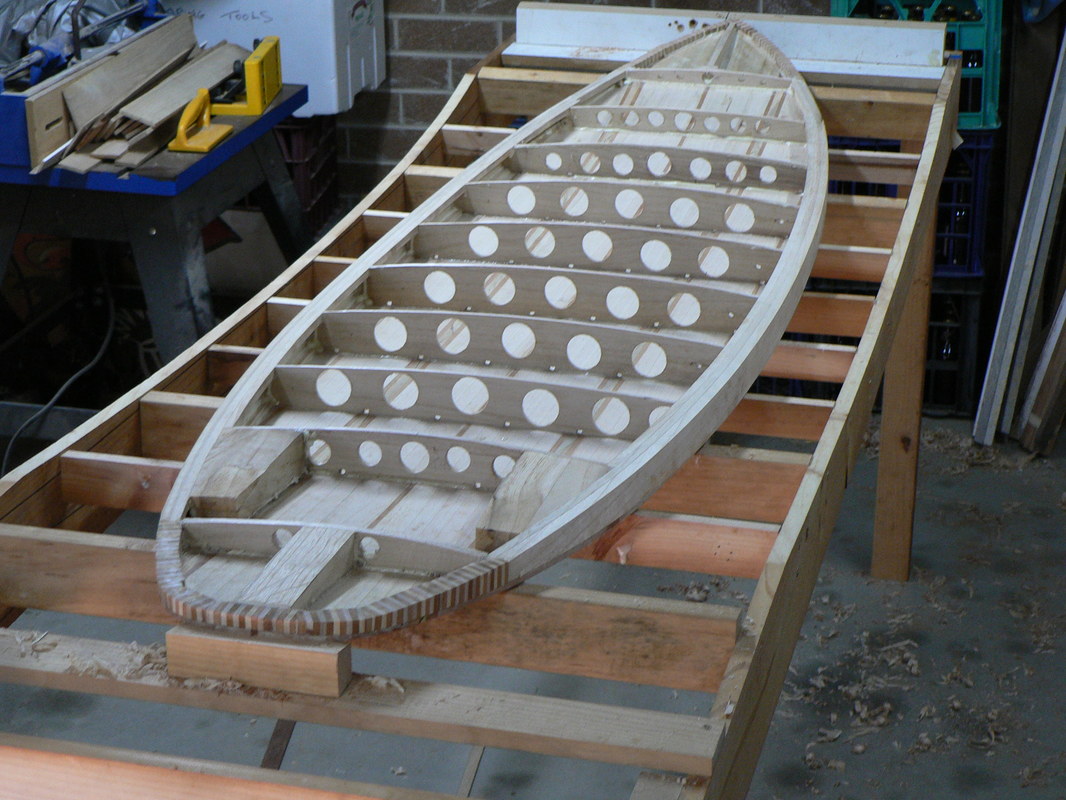
Started shaping my first hollow wooden surfboard
Firstly all that Paulownia that I had milled into 200mm x 50mm and other usable sizes according to the shape of the log , it then had to be re sawn on my band saw .then planed & thicknessed it into 5mm strips, then I started by making the centre stringer a lot of thought needed here as you have no visual reference you are shaping a ghost ,to make things even harder you are making the board from the inside out, by that i mean if you want the finished thickness to be 60 mm then you need to subtract 6 mm each side that is the thickness of top & bottom skin plus fibreglass ,because the rails are added later then you also need to subtract 40mm from each side & from the nose & tail ,so what you end up with is a board 12mm thinner ,80mm narrower & 80mm shorter than the finished board now that you have visualised all that ,yeah right !! now you can start shaping the centre stringer . Right now you should start to realise you are doing this because you know you can,how long it takes doesn't matter ,you are not trying to make money out of it ,its for the love of surfing & a lot more fun then making a coffee table.
I found that by first creating a full template then looking at it objectively a few adjustments then make a half template after tracing a line inside 40mm a few more adjustments to both templates and your ready to start .
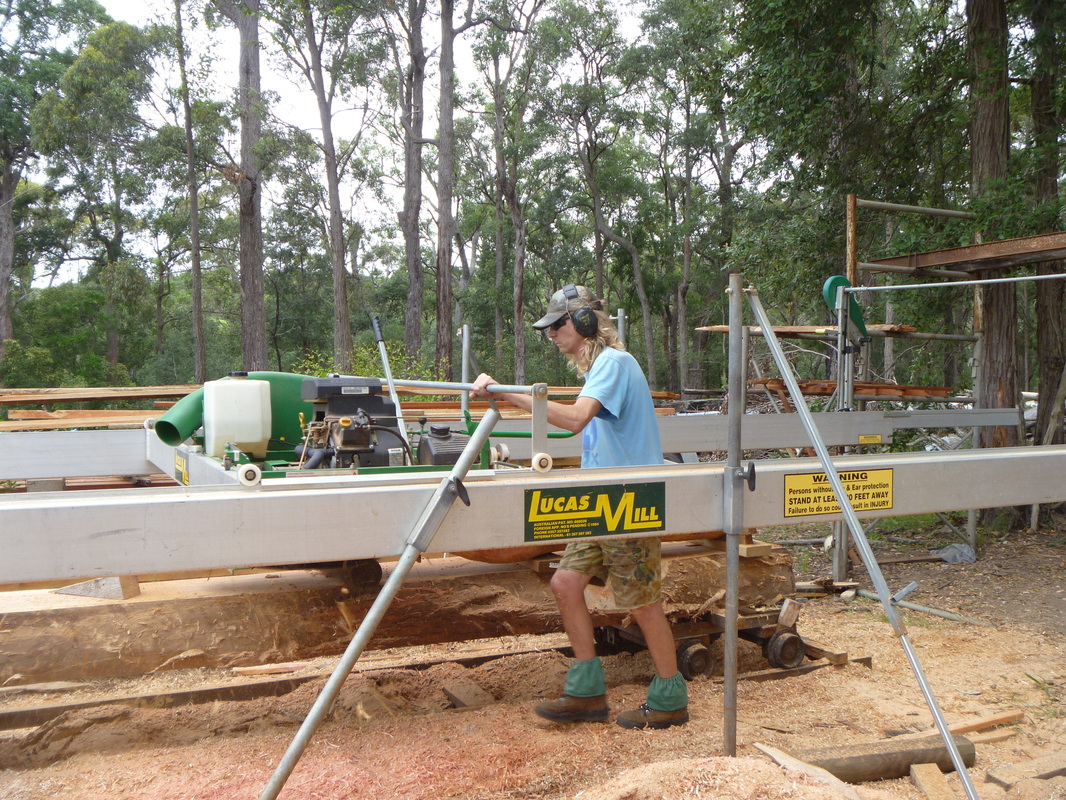
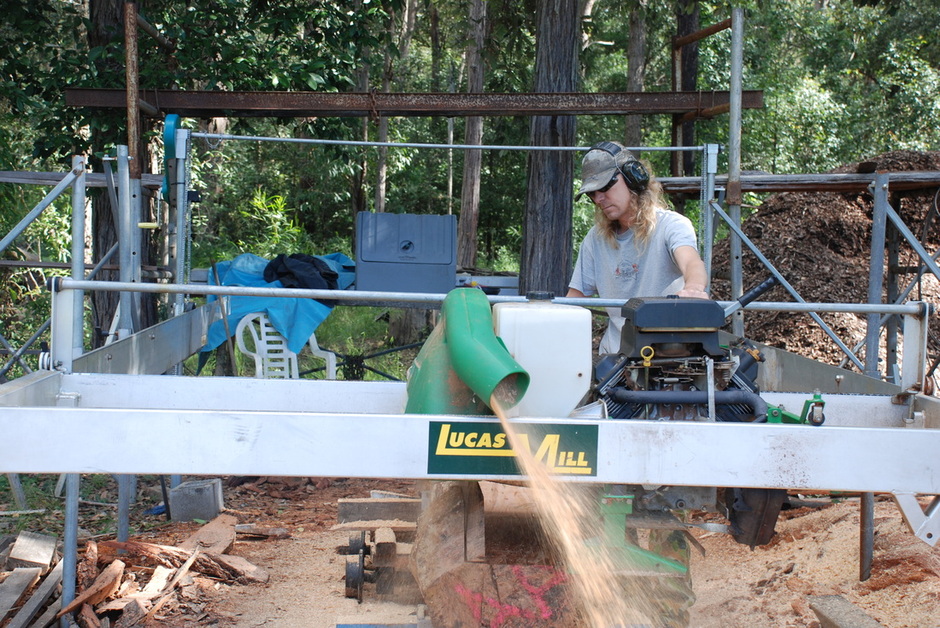
My son Airin milling a Paulownia log
What an incredible piece of machinery this is, once you have done a few logs its amazing how quickly you can cut a pile of usable timber ,even from a small diameter log providing you can hold it down securely so nothing gets wasted
This is a Paulownia tree in springtime the orchid like flowers have the most exquisite perfume that it fills the entire 1 acre block ,grown in a plantation they grow tall & straight but in the backyard they produce a large head so only the straightest branches & the trunk were used but no waste as the smaller pieces can used for making jewellery boxes musical instruments or other joinery projects all of the saw dust & shavings were returned to the garden as mulch
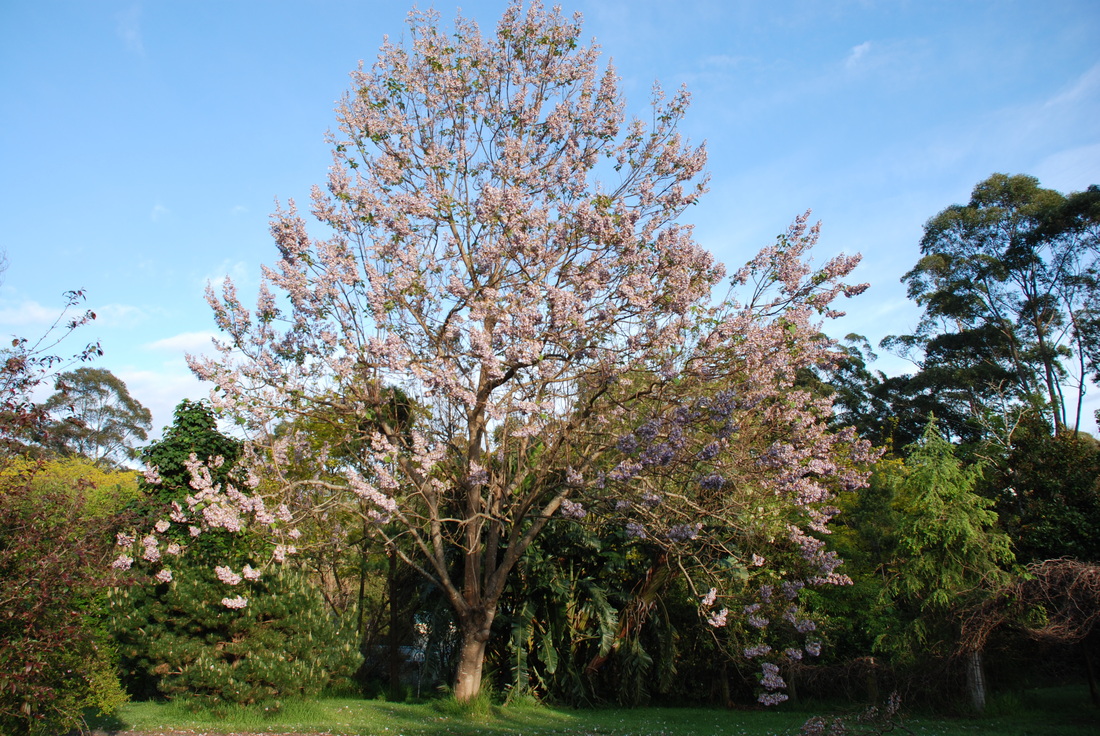
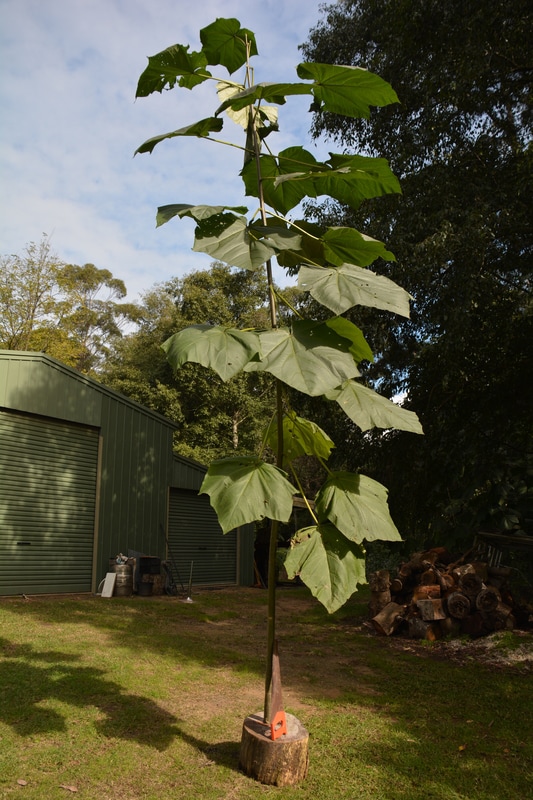
Paulownia grows very quickly 3 meters plus in one year in a good spot where there is a lot of moisture and low sunlight light the tree will grow tall & straight in an open location the tree will look like the one above with the flowers on ,not a lot of usable timber here but a beautiful tree none the less
|
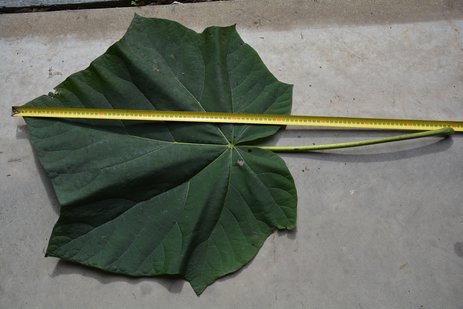
During the first years of growth the leaves of the Paulownia are huge, this one has a overall length of 1 meter the actual leaf is approximately 620mmx600mm but as the tree gets older the leaves get smaller to about the size of a hand .These trees are very prone to suckering but are easy to get rid off by spraying with glycosate [round up] or pull them out when small . The sucker on the left due to the very hot wet & humid summer grew to 3.6meters before I cut it down & moved it into the open so you could all see it . If you want a small sucker to grow contact me ,free to a good home .
|
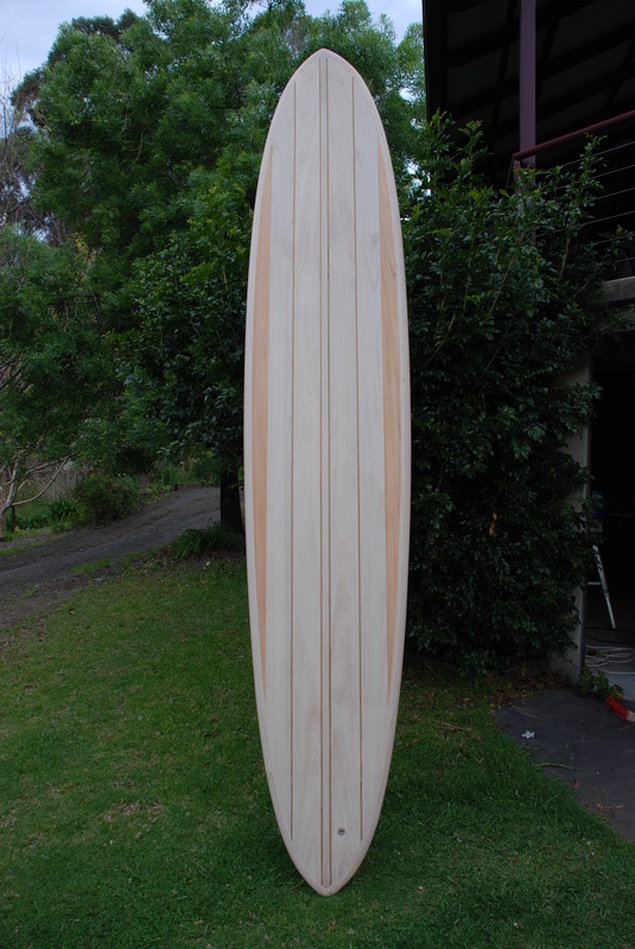
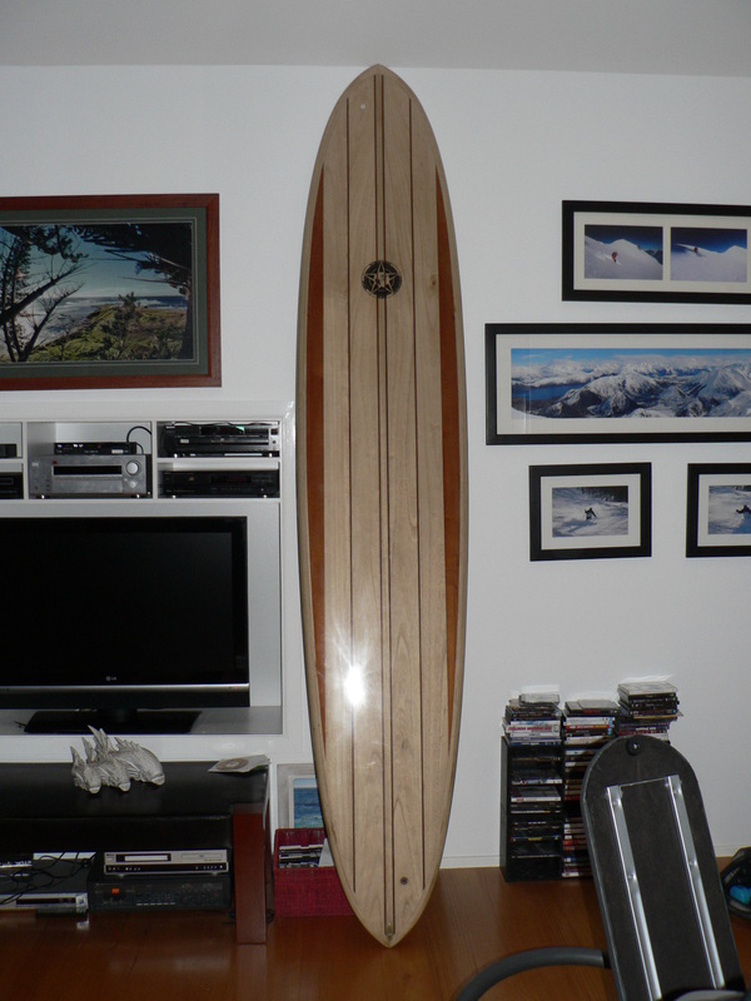
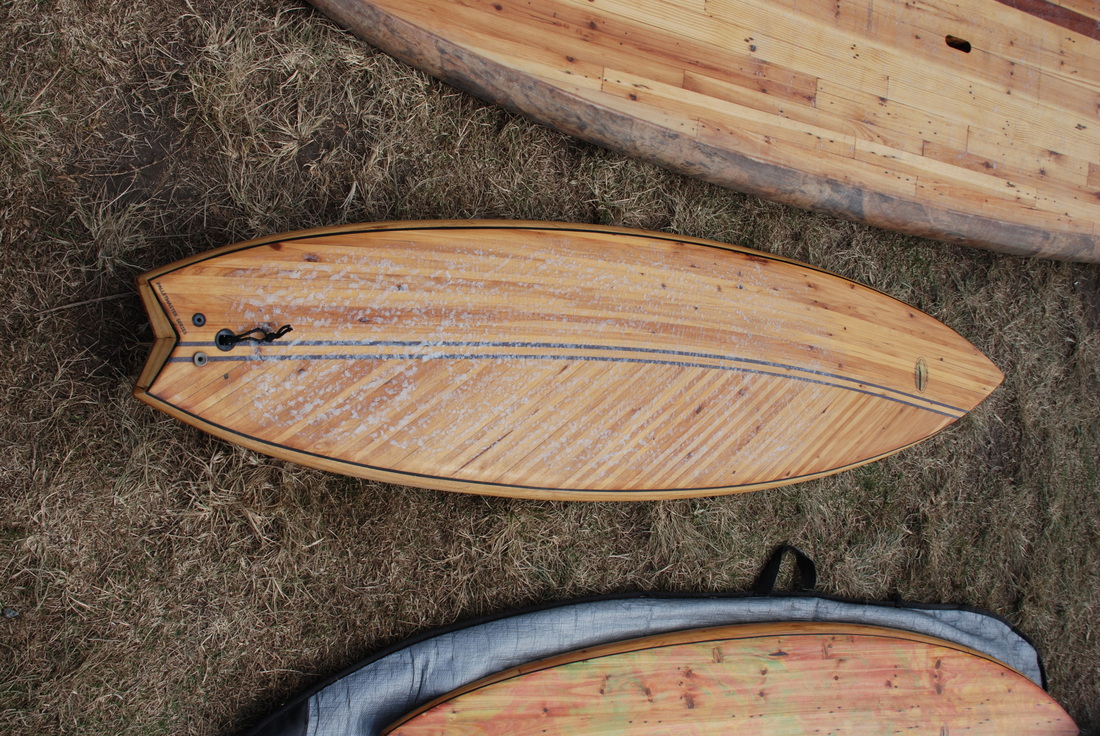
Well here it is my first hollow wood surfboard now ready for glassing it is 10'ft 2" x23.5" wide a pintail nose rider,following all the best advise on the net I have decided to glass this board with epoxy resin ,this is also the first time I have glassed a board using epoxy .
I started off by using a squeegee to spread a coat of resin firstly on the deck being careful to move the resin around very slowly so as not to cause it to air rate & turn milky or run over the rails you have almost unlimited time to do this so allow it to soak for at least 10-15 minuets before drying it off so that it does not run over the bottom allow at least 4 hours before repeating the process on the bottom . The next day lay out the class cloth , glassing the bottom first I used 4oz E glass , after thorough mixing using a slow stirring motion so as not to airate the mixture pour pretty much all the resin up the centre line of the board & slowly spread it out let it soak don't force it ,now with most of the excess resin near the rails gently pull it over the lap allow to soak while you are repeating the process on the other side, now back to the first side lap the glass onto the rail followed by the other rail ,then dry off any excess resin from the bottom & both rails pay a lot of attention to the edge or the lap making sure to keep it as neat & dry as possible I found that although this is the first time I have ever used epoxy it is so much easier than polyester due to the almost unlimited gel time. ,now stand back & admire all your hard work & that beautiful timber
I started off by using a squeegee to spread a coat of resin firstly on the deck being careful to move the resin around very slowly so as not to cause it to air rate & turn milky or run over the rails you have almost unlimited time to do this so allow it to soak for at least 10-15 minuets before drying it off so that it does not run over the bottom allow at least 4 hours before repeating the process on the bottom . The next day lay out the class cloth , glassing the bottom first I used 4oz E glass , after thorough mixing using a slow stirring motion so as not to airate the mixture pour pretty much all the resin up the centre line of the board & slowly spread it out let it soak don't force it ,now with most of the excess resin near the rails gently pull it over the lap allow to soak while you are repeating the process on the other side, now back to the first side lap the glass onto the rail followed by the other rail ,then dry off any excess resin from the bottom & both rails pay a lot of attention to the edge or the lap making sure to keep it as neat & dry as possible I found that although this is the first time I have ever used epoxy it is so much easier than polyester due to the almost unlimited gel time. ,now stand back & admire all your hard work & that beautiful timber
Here it is glassed with epoxy resin & all nice and shiny many of you will recognise the old sybernaught stickers these two were the last of the original ones made over 40 years ago the remainder of the ones that I had reprinted I Gave to Theo Happel who still uses them recently I contacted Theo who gave me six of the new ones that he had reprinted ,these will be used on the next few hollow boards that I will soon be making
Well its been a long time since I put some new info on my website ,the older I get the busier I get I am now almost 71 cant believe how fast these last few years have gone .Since building my first board I have been fortunate to meet many others with the same passion ,I travelled to Currumbin with Dave & Martin to the wooden surfboard weekend this inspired us to have a similar event held in conjunction with the Thirroul Seaside Festival in April of 2015, don"t have any photos from the Thirroul event , the photos below are from the trip to Currumbin.
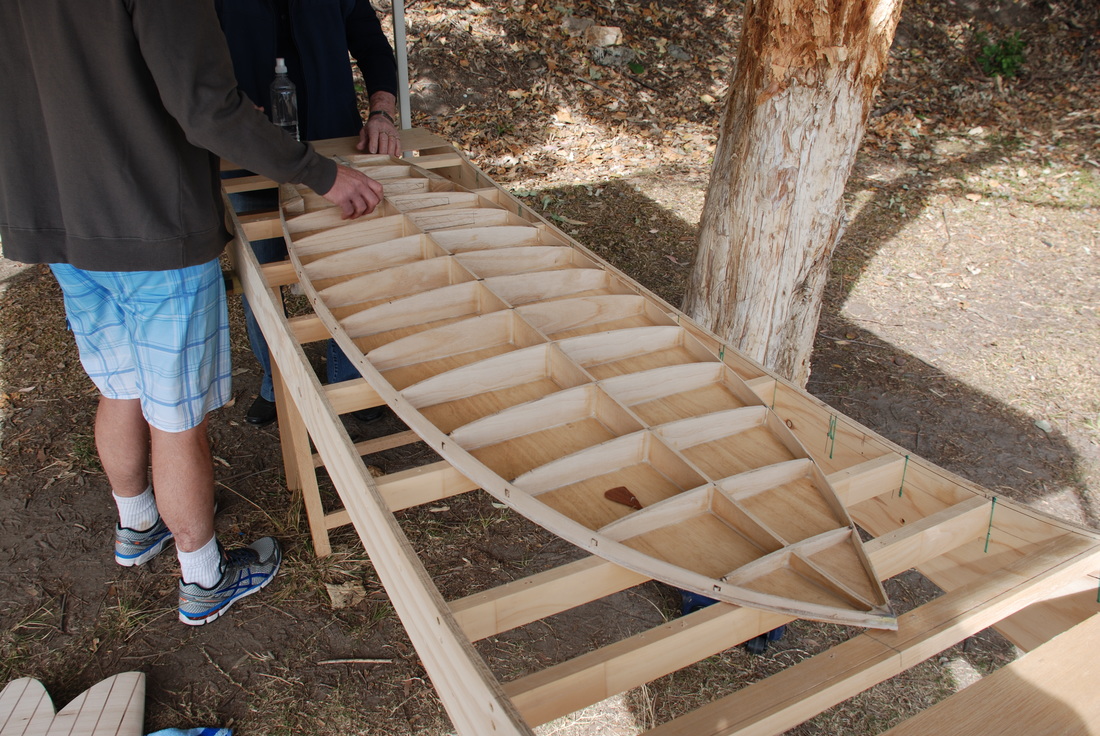
I think this is the easiest way to go ,firstly create or copy the rocker from yours or someone else's favourite board , if you are going to copy set out your rib location on the bottom of the board you are copying using masking tape ,then by placing a straight edge along the bottom of the board & measuring down you can set out & plot the bottom curve, by using callipers you can measure the thickness at the centre and perhaps at 3 more points along each rib to plot the curve of each rib use a thin piece of narrow plywood about 20-25mm or plastic or even a hacksaw blade to get a smooth curve on the ribs .
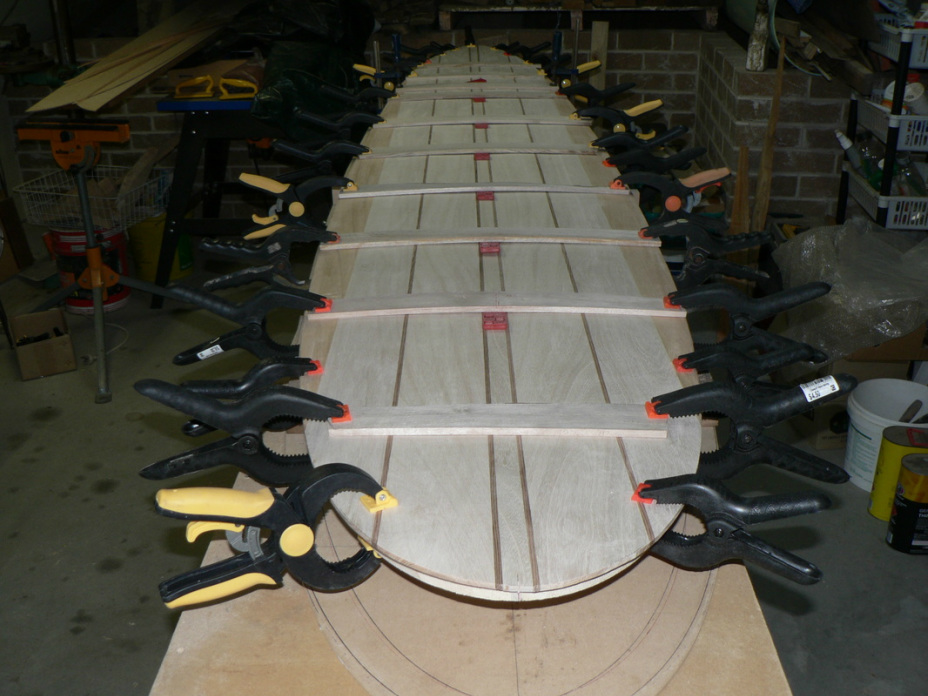
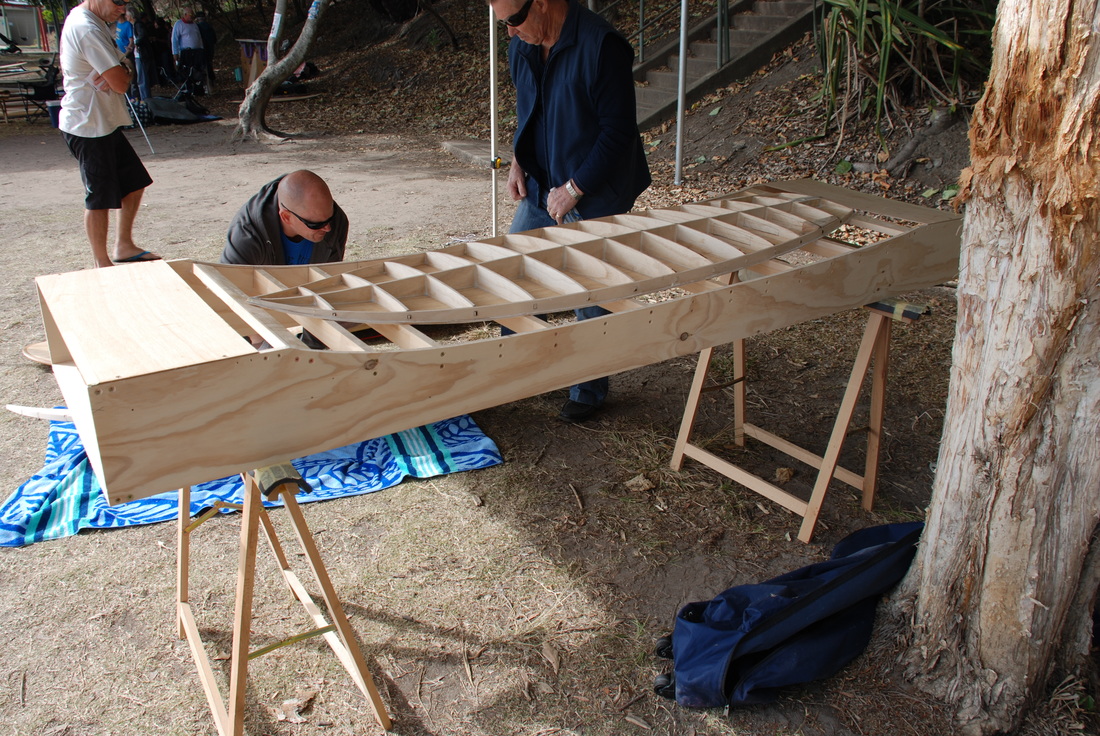
Once you have made the rocker template you can easily make up the rocker table as shown in the photos ,if you think about it you could also make an adjustable table ,but if your like me & only make a board every now and then, & want to make something entirely different each time you can easily convert your existing table more detailed info is available on request .
Once you have made the rocker template you can easily make up the rocker table as shown in the photos ,if you think about it you could also make an adjustable table ,but if your like me & only make a board every now and then, & want to make something entirely different each time you can easily convert your existing table more detailed info is available on request .
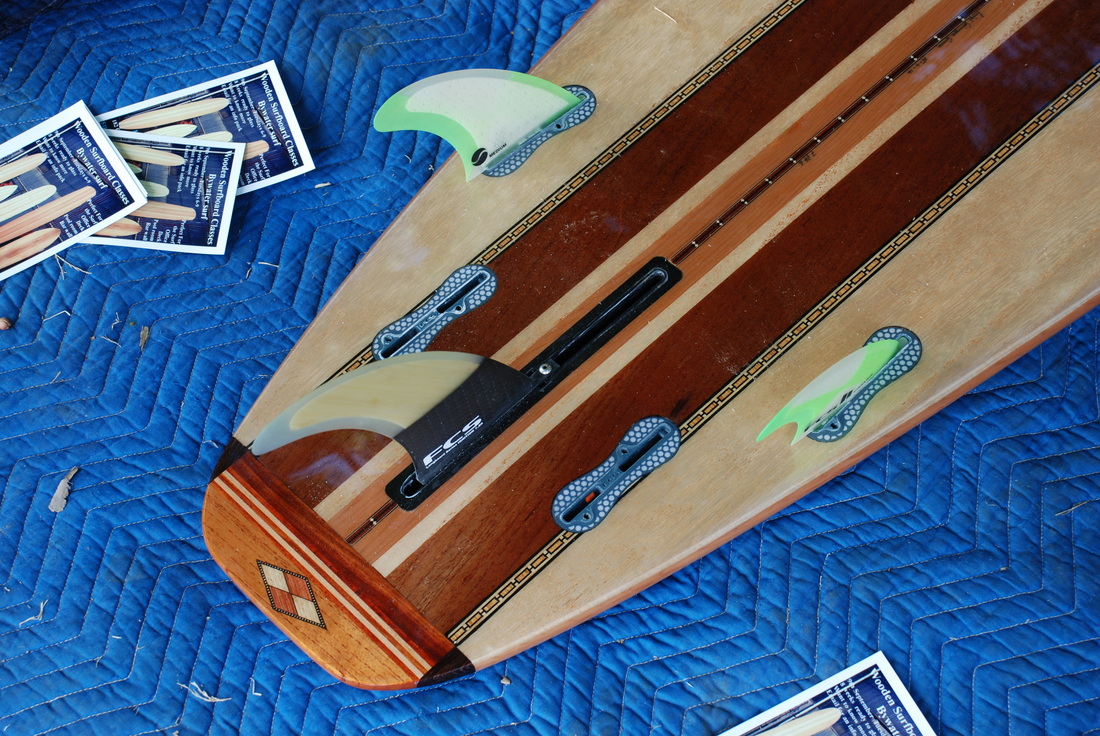

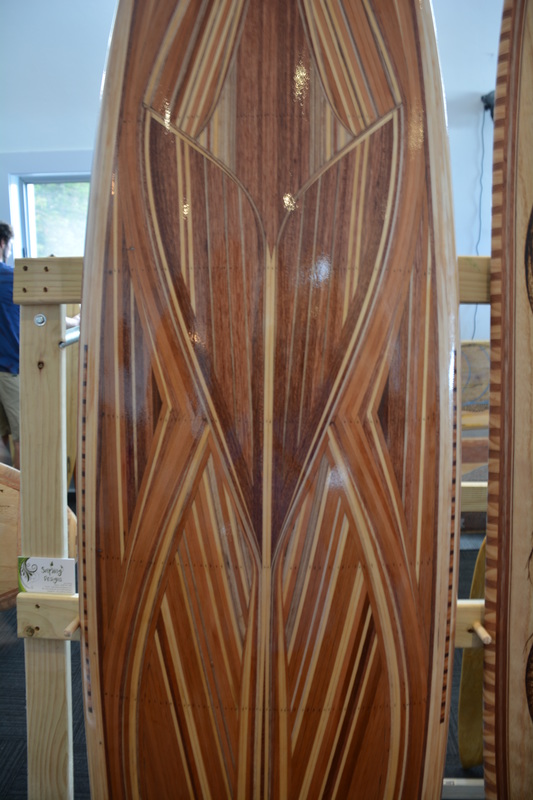
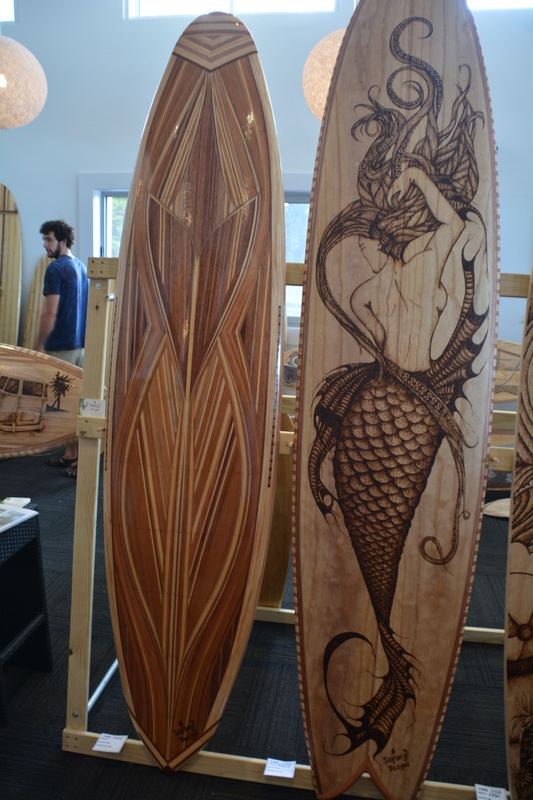
Now a few boards from the Thirroul 2016 seaside festival ,something that really impresses me about all the boards I have looked at is the fact that so many of the board makers have never surfed ,are not carpenters & have never built a board before yet the craftsmanship is outstanding, to be in the company of such talented people is indeed a privilege .Many of these boards have become a blank canvas displaying the incredible artwork of Lisa Fahey & others in addition to the intricate detail of the woodwork, such patience & devotion to hand crafted detail is seldom seen in today's mass production world .
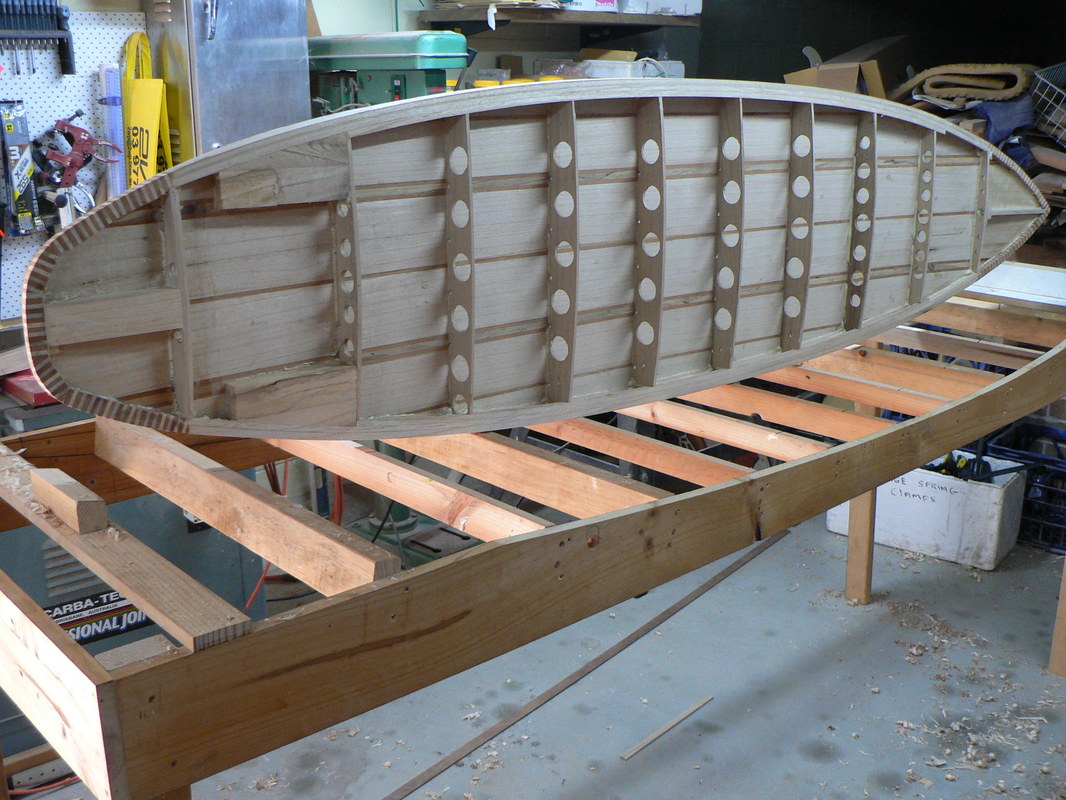
The following photos show some details of the board building process ,the rocker table was constructed from scrap timber, everything has now been glued in place including the fin blocks,you can see how the rails have been formed inside the board much easier than bending strips around the outside there is no need for a centre stringer when using a rocker table to clamp to, reducing weight by drilling holes where possible, however if you know this board is going to be ridden I would add some short stringers where you know your front a back feet are going to be no further than the mid point unless its a Mal, i would also glass the underside of the deck to the mid point with 4 oz taping off the where it meets the rail, ensuring the bond when you glue the deck down, so it also does not make it hard when you shape the rails